


As the weather warms up and you are spending more time outdoors, now is a great time to check your outside plumbing and make sure everything is in working order.
Here are a few quick checks you can perform:
Your Outside Faucets May Have a “Freeze Break”
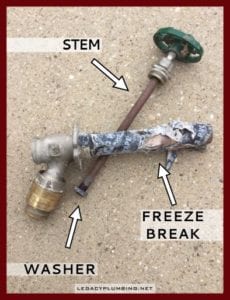
Although many outside faucets are “frost-proof” by design, they can still have a freeze break if a water hose is left attached during the wintertime. When you turn the handle to close a frost-proof faucet, it actually shuts off the water back inside the wall behind the brick or siding. This is done so that all of the water that is outside the home’s thermal envelope can drain out of the faucet and won’t freeze.
However, if a garden hose is left attached during the wintertime, it doesn’t allow all of the water to drain out. The water that is still inside the faucet can burst the pipe when it freezes. Because the water is shut off prior to this point, it won’t start leaking right away. You won’t notice this problem until you turn the faucet on for the first time in the Spring. When you do, you will notice the hose faucet leaks.
It is only then that water fills the tube and sprays into the wall behind the brick or siding where you can’t see it right away. Pay close attention the first time you turn on each of your exterior faucets after a freeze. Turn them on for a few seconds, then turn them off. If that looks fine, hook up a hose with a spray head on the end. Leave the head turned off so that the hose builds up water pressure. Look carefully at the wall below the faucet where the brick meets the concrete foundation. This is called the brick ledge. Go inside and look at the bottom of the wall directly behind the faucet. If you see water in places it shouldn’t be – you might have a frost-proof faucet with a burst pipe in the wall that will need to be replaced.

So, what if your outside faucet is just dripping constantly even if you have it shut off all the way? If you can actually catch the leak soon after it starts, there is a possibility that you can repair the faucet by replacing a washer inside the faucet. However, if it has been leaking for more than a couple of weeks, replacement is probably necessary. This is because the slow water leak can quickly create a groove inside the brass faucet “seat” that is not repairable. If this happens, you’ll need to replace the entire faucet.
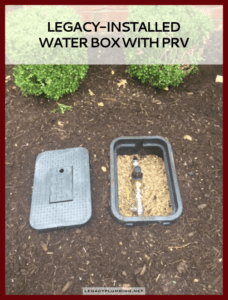
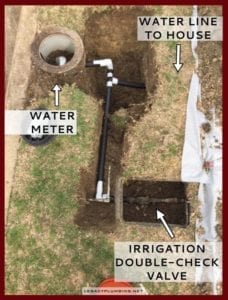
Know Where Your Water Box Is
So what exactly is a water box and why is this important? Most houses are equipped with a shut-off valve close to the house that can shut off the main water supply coming into the house. These are typically located in a plastic valve box in a flowerbed (possibly under some bushes or shrubbery). The lid is usually either a black or green rectangle a little larger than a sheet of paper or a green circle about 10” in diameter.
It is important to know where yours is located if you ever need to shut the water off to your house quickly to prevent water damage in the event of an emergency leak. Taking a few minutes to find yours and ensure it is in working order might save you some heartache later on.
If you can’t seem to locate your valve box near the house, one hint is to locate the round black-lid meter box near the street and follow a straight line towards the house. You might need to dig around a bit under the mulch to uncover it. Another way to find it is to look for your main sewer cleanouts. If your house was built sometime within the past 30 years, then these usually look like two white pipes close to each other with caps on them sticking up out of the ground. The water box for the home is very often a couple of feet to the right or to the left of these sewer cleanouts.
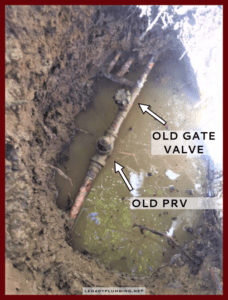
Once you’ve located the water box, remove the lid and take a look inside. If you see water in the box (and it hasn’t rained recently), you might have a leak. If you just see dirt, it is likely that the valve inside has been buried by dirt intruding into the box over time. It usually isn’t a good idea to try to use these valves when they are in this condition. If you see a pipe but not a handle, then the handle has probably rusted off entirely! If you find yours in this condition, it’s probably time for a new one.
If you can see the valve(s), then you will probably either see a lever-style handle or a round-style handle. The lever-style handle is called a ball valve, and these are usually pretty reliable valves. The round-style handle valves are most likely ‘gate valves,’ which shut the water off by lowering a “gate” as you turn the handle. These guys are notorious for sticking (either in the open or closed position). Handle with care, as you don’t want to turn it off only to discover you can’t get it to turn back on! We recommend replacing this type of valve with a quarter-turn ball valve with a lever handle.
Quick Tip – if you do need to operate an old gate valve, do so with care and by turning two turns down/one turn up… two turns down/one turn up… until you get it turned all the way off. This can help break up any calcification, but is not guaranteed to work.
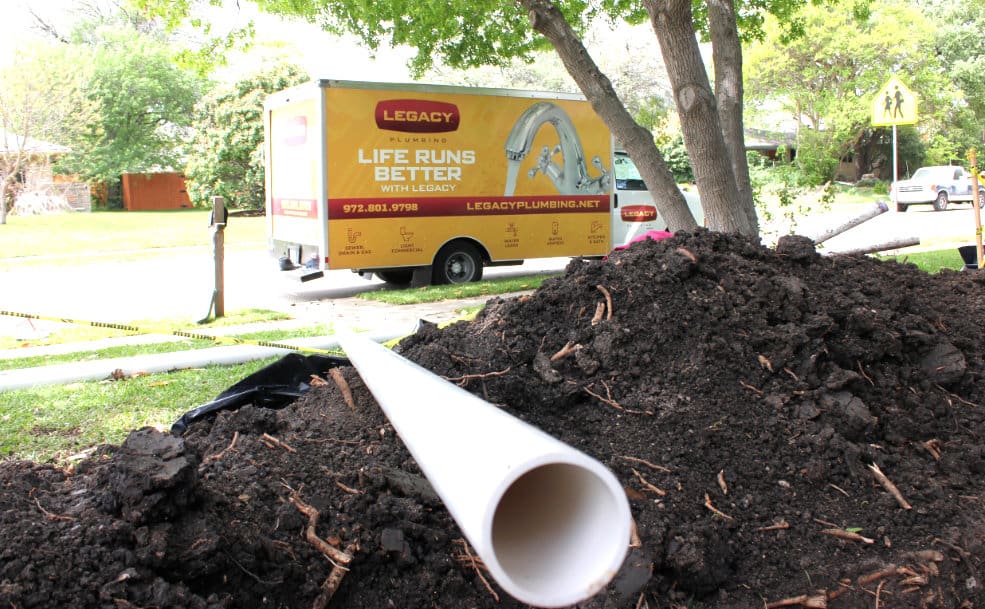
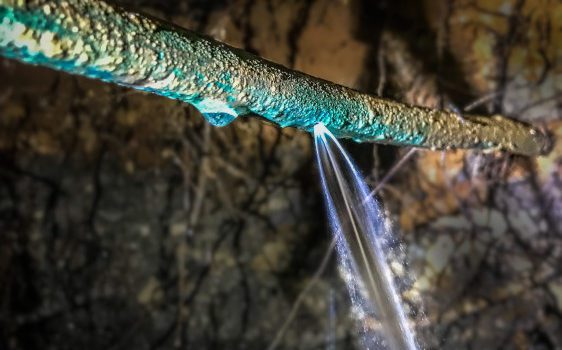
Check For Yard Leaks
Check to see if you have any wet or soggy spots in the yard. You may have a spot of grass that is noticeably more green than the rest of the yard. You may even have a wet sidewalk.
These are telltale signs of a water leak in the yard. Did you find some water? You will need to determine if the leak is coming from your main water service to the house or your irrigation system. Although water does travel and wet spots can be deceiving, if the soggy spot is not along the line between the water meter and the water box near the house, there is a good chance the leak is in the irrigation system. One way to find out is to isolate your sprinkler line from your house line. First, open your meter box to reveal a counter or series of dials.
Most modern meters have a red triangle or a small dial in the center that readily spins when water is flowing through it. Some meters are digital and have an LCD display. If you see one of these with a bunch of numbers, wait for a minute and you should see a three-digit reading that shows the current usage in gallons per minute (GPM). If you see 0.00, it means the meter is not registering any water running at that moment.
If you see a spinning triangle or a GPM display above 0, then that means that water is running somewhere on your property. Verify that no faucets are dripping inside the house and that no toilets are running/hissing.
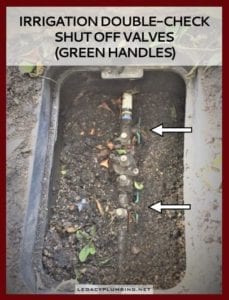
Next, find the irrigation box (or double check valve box), which is typically found close to the street near the round meter box. It is usually a green rectangular lid a bit larger than a sheet of paper. Inside the box is the double check valve which prevents any dirty irrigation water from flowing back and contaminating your home’s water.
The double check valve should have two isolation valves on either side of it with blue or green lever-style handles. Either of those valves can be shut off to shut down water flow to the entire irrigation system.
If you turn the valve off and the meter stops spinning, you know the leak is on the sprinkler/irrigation system, and you need to call an irrigation company. However, if the meter continues to spin, the leak is on the main water line to the house (or a pipe underneath the house) and you need to call a professional plumber!
What if I have a water leak?
If you find that you have a significant water leak outside, you can buy some time by manually shutting the water off to the property when you don’t need it (at night or while you’re away at work) to conserve water and only using it one for a short duration when you need it.
A special tool called a meter key is required to shut off the water supply at the meter. We believe every homeowner should have one of these, which can be purchased at your local hardware or plumbing supplier. This can lower the urgency of your plumbing emergency to give you some time to schedule plumbing repairs or the replacement of the line while minimizing usage and inconvenience.
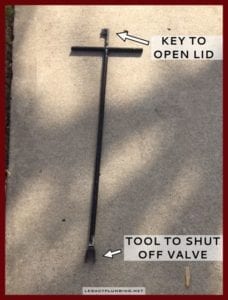 To shut the water off at the water meter, you first need to take the lid off. They often have a lock to keep them on, so your water meter tool should have a “key” on the end. Insert the key into the comma-shaped hole in the lid. Twist counter-clockwise and pull up. The lid should come off.
Then on the back side of the water meter (closer to the street), there should be a valve that looks like a brass circle with a raised middle section. You can turn this valve clockwise until the padlock holes line up to shut the water off. Open the valve by turning all the way counter-clockwise. Sometimes the valve can be stiff and hard to turn. Sometimes it won’t turn at all and you will have to call the utility provider to shut it off (another good reason to have a usable house shut off valve).
By the way, most utility companies will be lenient in their assessment of fees if you let them know that you are intending to make the repairs in a timely fashion. This is especially important when the only indication of a leak is revealed through an extraordinarily high water bill.
Quick Tip – When shutting the water off to the home, be very careful when turning it back on. Go slowly. Changing the water pressure suddenly on old plumbing valves can cause them to leak. We recommend having someone inside monitoring fixtures and shut off valves (behind toilets, under sinks, behind washing machines, water heaters, etc…) to ensure no leaks spring up.
Have more questions?
Contact Legacy Plumbing today for help from our team of certified and pr